Ok so who out there is so impatient to just get started with creating that they will do whatever they can to cut corners and just get on with the fun stuff? That is so me, if something is delaying me getting to the good creative stuff then if possible, it’s got to go!
I’m sharing my favorite altered book art journal with you here today and I am also sharing my top five lazy artist tips for working in them because ain’t nobody got time for all that prep work!

Altered Book Art Techniques | My Top Five Tips
Hands up all my impatient and often lazy artists? Is it just me or does prepping things for forever just put you right off getting started? When I first looked at altered book they just seemed like so much work before you even started! Well I couldn't be doing with that so I am sharing my top five tips for working inside an altered book
1.Find a book you love
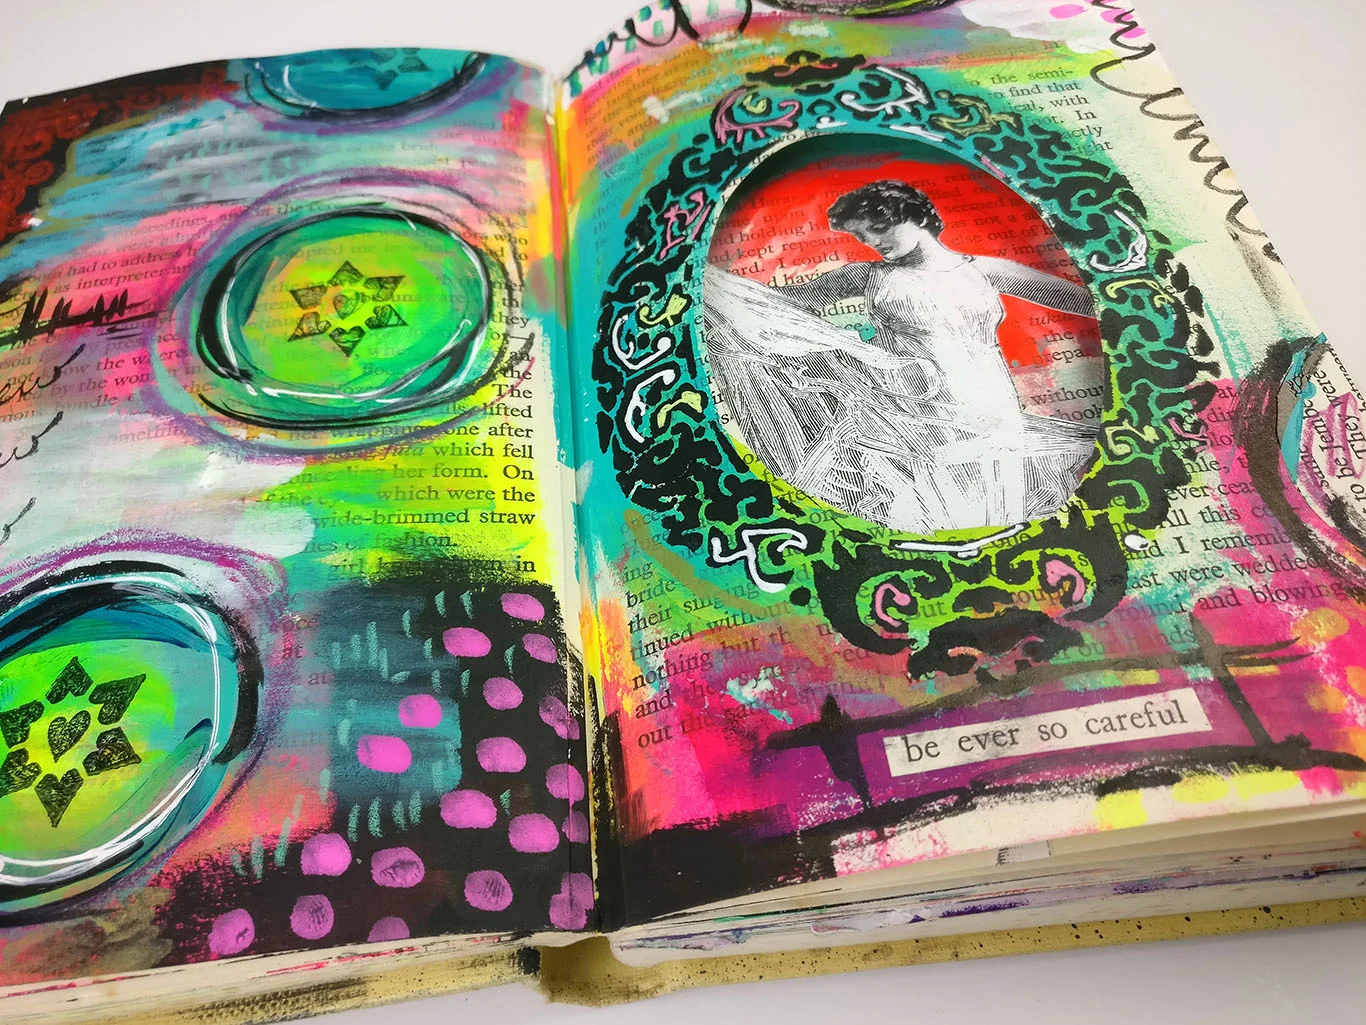
This might seem obvious but it’s important that you find a book that you really love. You’re going to be working in it for a while so you need to want to keep it around! Look for a book that is still in good condition, especially around the spine, bonus points if you can find one with cool photos in it!
2. Don’t worry about prepping pages
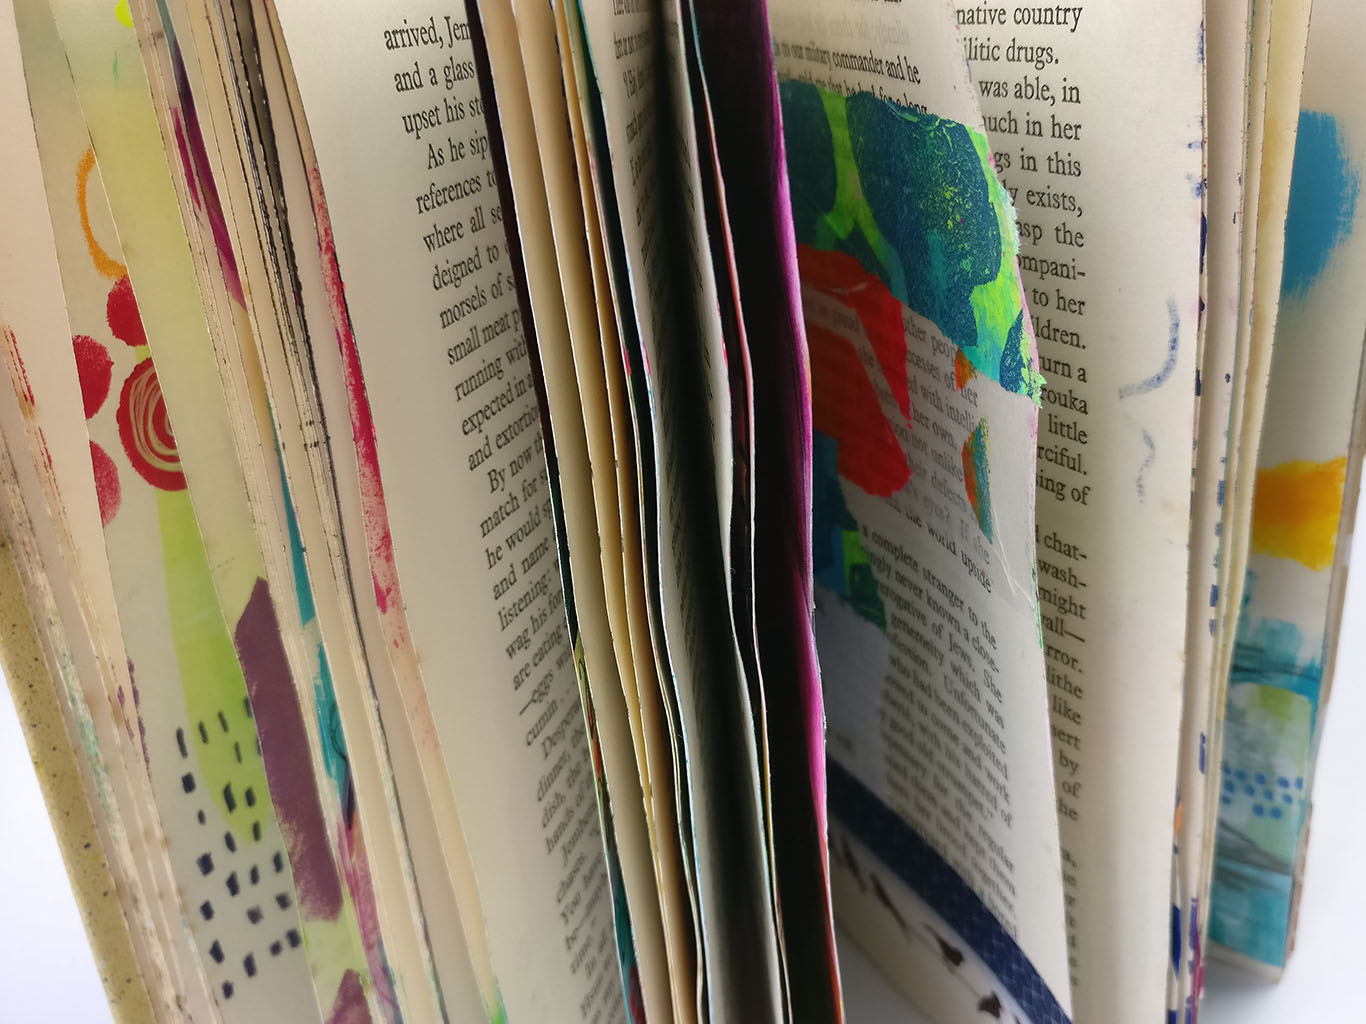
I had a few altered book journals and I followed many techniques to prepare the pages before I started working in them. Ripping out pages, cutting out pages, gluing pages together… it just took too much time and like I said, too lazy here! I haven’t prepped by book at all before getting started in it and I have to say it’s worked just fine so far!
3. Layer with Paint
I really wanted to explore layering with paints instead of adding any bulk to it. I really think this is what has stopped my book from falling apart or becoming strained. I still love all the pages in the book and I rarely prepare them with gesso first. I love not having the blank page fear in front of me!
4. Keep embellishments to a minimum
So for the same reason that I decided to layer with paint I also kept the embellishments that I used to a minium. As you can see from my video I definitley added layers into it with things like tissue paper and stitching but these layers are flat and don’t add bulk to my altered book.
5. Don’t work in order
So for my last altered book technique, and probably the best one, not working in order is probably the most important and helpful. By working in a random order throughout the book it means that you can avoid putting stress on just one area. If you notice any areas becoming too full then you can just move away from it to the next one!
I hope you enjoyed the tips, I’d love to see how you use altered books, leave me a comment below and drop a link to your creations!

Let’s dig a little deeper!
What if there was something that could help you work though identifying your style and give you some great ideas of ways to grow it? Wouldn’t that be great? Well my friend, I got your back! I’ve created the “Map Your Style Workbook” and you can get it for free from me right now!

The workbook is broken into two sections. Firstly we look at your style and how to identify it with a series of excercises. The next section takes the elements of our style we already have and works on ways to grow it more, to push you (gently!) outside of your comfort zone!
So what are you waiting for! Join me and help Map Your Style right now!


I’m a Mixed Media Artist, Art Journal Keeper and Teacher. I love to create, get paint on all my clothes and share my love of creativity with others. I’m so glad you stopped by